If your dentist or oral surgeon has recommended a tunnel graft, you may be wondering what this procedure entails. In simple terms, a tunnel graft is a minimally invasive grafting technique used in dentistry to rebuild lost tissue (often bone or gum) with only small incisions. This approach can make certain treatments – like dental implants or gum recession repair – possible even when there isn’t enough bone or gum tissue.
In this article, we’ll explain exactly what a tunnel graft is, who might need one, and what to expect before, during, and after the procedure. We’ll also discuss the benefits, risks, alternatives, and costs associated with tunnel grafts, so you can make an informed decision about your oral health care.
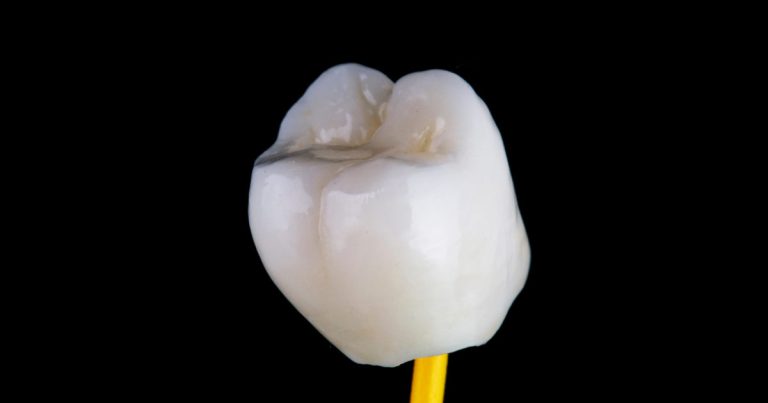
What Is a Tunnel Graft?
A tunnel graft is a grafting procedure that uses a “tunneling” technique to add material (such as bone or soft tissue) through a very small opening in the gum, rather than opening a large surgical flap. In other words, the dentist creates a narrow tunnel under the gum and inserts graft material into that space to rebuild or augment tissue. This technique is considered minimally invasive – it’s somewhat analogous to laparoscopic surgery in medicine, where only tiny incisions are made instead of a large opening.
In dentistry, tunnel grafts are most commonly used to widen a thin jawbone (alveolar ridge) in preparation for dental implants. If the jawbone has shrunk or lost width (often due to long-term tooth loss or periodontal disease), a tunnel graft can add bone graft material under the gum to build the ridge back out. Unlike some other grafting methods, a tunnel graft typically does not increase the height of the bone, only the width.
The tunneling approach can also be adapted for gum grafting in certain cases of gum recession. In that context, a periodontist creates a small tunnel under the receding gums and inserts a soft tissue graft (often from the patient’s palate or donor tissue) to cover exposed roots. This is known as the tunneling technique for gum grafts. However, usually when dentists refer to a “tunnel graft,” they mean the bone grafting technique for ridge augmentation described above. We will focus mainly on the bone graft usage, as it’s commonly discussed in oral surgery.
Who Might Need a Tunnel Graft?
A tunnel graft is typically recommended for patients who lack sufficient jawbone width to support a dental implant or other dental restoration. Common scenarios where you might need a tunnel graft include:
- Long-Term Tooth Loss: If you have been missing a tooth (or teeth) for a long time, the jawbone in that area may have receded or atrophied (shrunk). Without a tooth root to stimulate it, the bone can become too narrow for an implant. A tunnel graft can add bone to such areas so that an implant can later be placed securely.
- Periodontal (Gum) Disease: Advanced gum disease can lead to bone loss around the teeth. If bone loss has occurred and you later need an implant or are experiencing a sunken appearance in your jawline, a tunnel graft might be used to fill in areas of bone loss caused by periodontal disease.
- Preparing for Implants in the Lower Jaw: The technique is especially useful in the lower back jaw (mandibular molar area). After losing lower molars, patients often experience significant horizontal bone shrinkage. A tunnel graft can make the jaw wider in cases of missing lower back teeth so that standard implants can be placed. This area can be one of the most challenging zones for bone augmentation, and the tunnel method is a way to address it when other methods might be difficult.
- Multiple Adjacent Teeth Missing: If a section of your jaw has multiple missing teeth and the ridge is uniformly narrow, a tunnel graft can sometimes rebuild the contour along that span without multiple large incisions. This can benefit those planning for a bridge or multiple implants in a row.
Keep in mind that not everyone is a candidate for a tunnel graft. The bone’s shape and the condition of your gum tissue play a role. For the technique to work, you need to have enough healthy gum tissue to allow the surgeon to create the tunnel without tearing it. Extremely thin gum or certain bone shapes might make the procedure unfeasible. In very severe bone loss cases, more extensive grafting techniques (like a block bone graft) might be required instead. Your dental specialist will evaluate your specific situation to determine if a tunnel graft is appropriate.
Common Signs You May Need a Tunnel Graft
Unlike a cavity or gum infection, a lack of bone width isn’t something you will usually feel or notice on your own at home. Often, patients learn they need a bone graft during a consultation for an implant or denture. However, there are some signs or situations that could indicate a tunnel graft might be in your future:
- “Sunken” or Indented Ridge: If you look at the area of a missing tooth and notice that the gum and jaw seem caved in or narrower compared to the surrounding areas, this indicates bone loss. Your lip or cheek might also appear a bit “sunken” in that spot due to the reduced bone support. This is a visual clue that there may not be enough bone volume for a dental implant, and grafting could be needed.
- Dentist Tells You There’s Not Enough Bone: The most common way patients find out is when a dentist or oral surgeon takes an X-ray or CT scan and explains that the jawbone is too thin for an implant. If you’ve been told this, a tunnel graft is one possible solution to rebuild the bone.
- Loose Denture or Partial in One Area: If you wear a denture or partial denture, you might find that one area (often the back of the jaw) doesn’t hold the denture securely because the ridge is very narrow. A bone graft in that area could potentially improve the fit by widening the ridge (though often dentures are managed with other techniques).
- History of Periodontal Disease: If you’ve had serious gum disease, you may already have bone loss around certain teeth. Even after the disease is treated, those areas might be lacking bone. If you eventually lose those teeth or consider implants, bone grafting may be needed. People who know they’ve had bone loss might anticipate that grafting could be part of future treatment.
- Tooth Extraction Sites: If you had a tooth removed and it healed without a socket preservation graft, the site might have shrunk. Months or years later, if you run your tongue over the area, it might feel like there’s a dip in the gum. This can hint at reduced bone volume. (Dentists often perform immediate socket preservation bone grafts at the time of extraction to prevent this shrinkage, but if that wasn’t done, the need for a later graft is more likely.)
In summary, you as a patient might not self-diagnose the need for a tunnel graft. It’s usually identified by a dental professional via imaging and exam. However, being aware of these signs can help you ask the right questions. If you suspect bone loss or have been without a tooth for a long time, bring it up with your dentist – they can assess whether a bone graft like the tunnel technique is warranted.
What Happens During a Consultation for a Tunnel Graft?
If your dentist or oral surgeon thinks you might benefit from a tunnel graft, they will conduct a thorough consultation to plan the procedure. Here’s what you can typically expect in that consultation:
- Dental Examination and Imaging: The dentist will review your dental and medical history and perform an exam of the area in question. Expect to have X-rays taken, and often a 3D scan (CBCT) of your jaws. The imaging helps measure how much bone is present and precisely where more bone is needed. It also shows important structures (like nerves or sinus cavities) that the surgeon will need to avoid during the graft.
- Discussion of Options: Your provider will explain why a bone graft is needed and why the tunneling technique is recommended in your case. They may also mention alternative approaches (for example, a block graft or doing nothing and choosing a different tooth replacement option) and explain the pros and cons of each. If the tunnel graft is suitable, they’ll focus on how it works and why it’s beneficial (e.g. less invasive than traditional methods).
- Health Review: You’ll be asked about your general health, medications, and habits like smoking. Health conditions (such as uncontrolled diabetes or immune issues) and smoking can affect healing, so the dentist will want to ensure it’s safe to proceed and may give advice on optimizing your health before surgery. They might request clearance from your physician if you have any complex medical issues.
- Anesthesia and Sedation Plan: The dentist will talk to you about how they manage comfort during the procedure. A tunnel graft can often be done under local anesthesia (numbing shots) alone, but many surgeons also offer sedation for patient comfort. Depending on your anxiety level and the complexity, options might include nitrous oxide (laughing gas), oral sedatives, or IV sedation. They’ll recommend the appropriate level of anesthesia and ensure you understand any preparations needed (like fasting if IV sedation will be used).
- Pre-Op Instructions: If you decide to move forward, you’ll receive instructions to follow before surgery. This could include guidance such as avoiding certain medications (like blood thinners) prior to surgery, arranging a ride if you’ll be sedated, and ensuring you have any prescriptions (e.g. antibiotics or pain meds) ready for after the procedure.
- Questions and Scheduling: The consultation is your chance to ask questions. Don’t hesitate to clarify anything that’s unclear – for example, “How much bone are we expecting to add?”, “What type of graft material will be used (my own bone, donor bone, synthetic)?”, “What are the success rates?” Your dentist should address all your concerns. Finally, they will discuss the timeline (how long to heal, when the implant might be placed) and go over the cost and insurance aspects of the procedure. If everything sounds good, you’ll schedule the tunnel graft surgery.
By the end of the consultation, you should have a clear understanding of why the tunnel graft is needed in your case and what to expect on surgery day and beyond. This appointment is all about planning and ensuring you’re comfortable with the upcoming procedure.
What Does the Process for Getting a Tunnel Graft Involve?
The tunnel graft procedure itself is typically an outpatient surgery (done in the dental office or oral surgery clinic). Here is a step-by-step overview of what usually happens during a tunnel graft:
- Anesthesia: First, the area will be numbed with local anesthetic injections so you won’t feel pain. If you and your surgeon have decided on sedation (such as IV sedation or oral sedation), that will be administered as well, so you’ll be relaxed or asleep during the procedure. (With IV sedation, you’ll need monitoring equipment attached, and you won’t remember the procedure afterward.)
- Small Incision (Remote Access): The surgeon makes a very small incision in the gum – often at one end of the area needing grafting, or sometimes a little distance away from the actual deficient area. This small opening is the entry point to create the tunnel. Because it’s so small and possibly a bit offset, it helps preserve blood supply and gum continuity in the main area.
- Creating the Tunnel: Using specialized surgical instruments (often thin, curved tools), the surgeon carefully works underneath the gum tissue, separating the gum (and periosteum, the thin membrane on bone) away from the underlying bone. They create a narrow tunnel or pouch along the region where bone is lacking. Importantly, the gum tissue between your teeth (if present) is left intact; the tunnel runs underneath it. This step requires finesse – the goal is to make enough space for the graft material, without tearing the gum tissue. The procedure is technique-sensitive, meaning it demands a skilled, steady hand.
- Placing the Graft Material: Once the tunnel has been made to the proper dimensions, the surgeon inserts the bone graft material through the small incision and into the tunnel. The graft material might be in particle form (resembling a sand or coarse salt texture) or a putty-like form. The surgeon uses instruments (or sometimes special syringes) to guide and pack the material into the deficient area under the gum. Essentially, they are filling the space between the existing bone surface and the gum/periosteum with new bone material. In some cases, they will also place a thin collagen membrane or mesh under the gum as a protective layer over the graft. The membrane can help contain the graft particles and prevent the soft tissue from growing into the graft too quickly. (Some membranes dissolve on their own; others might be removed later, depending on the type.)
- Closure: After the graft material is in place, the small incision is closed with stitches. Because the incision is tiny, very few stitches are needed – often just one or two. The surgeon will check that the area is nicely sealed and that the graft material isn’t leaking out. The stitches might be dissolvable or may need removal at a follow-up visit. The benefit of this technique is that no large gum flaps are reflected; the gum over the grafted area remains largely undisturbed except for that entry point. This can mean less trauma and faster healing.
- Post-Op Measures: The surgical team will place gauze over the site and have you bite down to apply pressure, helping to stop any bleeding. They will review immediate post-op instructions with whoever is accompanying you (if you were sedated, since you might be groggy). If not already done beforehand, you’ll get prescriptions for pain medication, antibiotics, or mouth rinse if the surgeon deems them necessary. They’ll also schedule your follow-up appointment.
The entire procedure usually is completed within an hour or so. In many cases, the active surgical time for a tunnel graft is about 30–45 minutes once you’re numb. (This can vary depending on how large an area is being grafted and the complexity of the case.) With sedation, you might be in the office a bit longer due to recovery time.
During the procedure, you should not feel pain because of the anesthesia. You may sense pressure or movement, but any discomfort should be minimal. If you’re awake, the most you might feel is some tugging or the odd sensation of tools under the gums, but it shouldn’t be painful.
After the graft is placed and you’re stitched up, you’ll spend a short time in the office until you’re stable to go home (especially if sedated). Then you’ll be discharged with instructions for at-home care, which we’ll cover next.
How Long Does the Procedure Usually Take?
A tunnel graft procedure is relatively quick compared to many other oral surgeries. Typically, the surgery itself takes around 30 to 60 minutes for a single area, once anesthesia has taken effect. The exact duration can vary based on several factors:
- Extent of Grafting: If only a small segment of the jaw needs grafting, the procedure might be done in half an hour. If a larger span of the ridge is being treated, or multiple tunnels in different sites are needed, it could approach an hour or slightly more.
- Surgeon’s Technique and Experience: An experienced oral surgeon or periodontist familiar with the tunnel technique might work more efficiently, completing it faster. In contrast, a less experienced practitioner might take a bit longer to ensure everything is placed correctly (note: since the technique is specialized, most who offer it are quite skilled, as it’s not commonly done by general dentists).
- Sedation vs. Local Anesthesia: If IV sedation is used, there’s time involved in starting an IV and allowing you to recover afterward, which can add to the total appointment length. The surgery itself under sedation might actually be quicker (because you’re completely relaxed and still). With local anesthesia alone, you skip the IV setup and recovery time, so you may be in and out sooner.
- Complexity: In some cases, there may be complicating factors – for example, a very tight gum tissue that takes longer to carefully tunnel through, or multiple separate tunnels needed for different parts of the jaw. These can extend the time. Conversely, a straightforward case with thick gums and a small defect might be quite quick.
Overall, you can expect to be at the dental office for about 1 to 2 hours total on the day of surgery. That accounts for prep time, numbing, the procedure (approximately 45 minutes give or take), and a short recovery period especially if sedation was used. For the surgical part alone, 30–45 minutes is a common estimate.
Your surgeon should be able to give you a more precise time frame during the consultation based on your specific case. The good news is that because the tunnel graft is minimally invasive, it generally doesn’t require lengthy operating times or hospital settings. It’s a fairly efficient outpatient procedure.
Pain Management and Comfort During a Tunnel Graft
One of the advantages of the tunnel graft technique is that it tends to be less traumatic, and thus often less painful, than traditional open bone graft surgeries. That said, it is still a surgical procedure, and both patient comfort during the surgery and pain control afterward are important considerations.
During the Procedure:
You will receive appropriate anesthesia so that you do not feel pain while the tunnel graft is being performed. As mentioned, this typically involves local anesthetic injections to numb the area completely. The numbing process might involve a few pinches from the needle, but after that you shouldn’t feel sharp pain. Many patients also opt for sedation. With IV sedation, for example, you’ll likely be in a twilight sleep or fully asleep – unaware of the procedure altogether. Oral sedation or nitrous oxide can also take the edge off anxiety. The choice depends on your comfort level and the provider’s facilities. If you remain awake with just local anesthetic, you’ll likely feel some pressure, tugging, or minor vibration (from instruments or suction), but it should be tolerable. Don’t hesitate to signal the dentist if you do feel anything sharp – they can always give more anesthetic.
After the Procedure:
Post-operative pain is typically mild to moderate for most patients, and often less intense than they might expect. Because the incision is small and the gum tissue isn’t fully flapped open, there is usually less swelling and soreness than a conventional bone graft surgery. Many patients report only a few days of minor discomfort. For example, one implant surgeon noted that his patient who underwent a tunnel graft said he had “no pain at all” one week post-op – while that might be an ideal case, it shows that significant pain is not a given.
Your dentist will provide a regimen for pain management:
- Medications: Over-the-counter pain relievers like ibuprofen or acetaminophen are often enough to manage post-op soreness in these cases. Ibuprofen is particularly helpful because it addresses both pain and inflammation (swelling). If your pain is more intense or if OTC meds are insufficient for you, the surgeon may prescribe a stronger pain medication (like a short course of opioids). It’s wise to take the first dose of pain medication before the numbness fully wears off, so you stay ahead of any discomfort. If you were prescribed antibiotics, be sure to take them as directed to prevent infection, which can also cause pain.
- Ice Packs: In the first 24–48 hours, using an ice pack on the outside of your face near the surgical site can greatly reduce swelling and numb the area slightly (which helps with pain). Apply cold packs in intervals (e.g. 20 minutes on, 20 minutes off) while awake, for the first day or two. Less swelling often means less pain.
- Rest and Head Elevation: Plan to go home and rest after the surgery. Keep your head elevated on a couple of pillows when lying down, even during sleep for the first night or two. This helps reduce throbbing and swelling, improving comfort.
- Soft Foods and Not Chewing on the Area: Sticking to a soft diet (more on that in Aftercare) will ensure you’re not aggravating the site or causing pain by chewing on a tender area. Also, avoid hard or pokey foods that could jab the wound.
- Mouth Rinse: Some dentists provide or recommend a chlorhexidine mouth rinse or warm salt water rinses to keep the area clean without brushing, which can reduce the risk of painful infections. Chlorhexidine is an antiseptic rinse you typically use twice a day gently (don’t swish vigorously). Warm salt water (1/2 teaspoon of salt in a cup of water) can be used after 24 hours to soothe the area.
During recovery, discomfort usually peaks in the first 48 hours and then rapidly subsides. Many patients feel that after 2-3 days, they can manage with just minimal pain medicine or Tylenol as needed. If you have persistent or severe pain beyond a few days, or pain that suddenly worsens after initially improving, that’s something to report to your dentist – it could signal an issue that needs attention.
In summary, pain management for a tunnel graft is straightforward: effective numbing and sedation options make the procedure itself comfortable, and after surgery, a combination of medication, icing, and rest will keep you reasonably comfortable. Most people find the experience much easier than they anticipated, especially compared to more invasive surgeries.
What Is the Recovery Process Like After a Tunnel Graft?
Recovering from a tunnel graft is generally smoother and faster than recovery from more invasive bone graft surgeries, thanks to the small incision and minimal tissue disruption. Here’s what the typical healing timeline and experience look like:
- First 1–2 Days (Immediate Post-Op): You will likely leave the office with gauze packs over the incision site. Keep them in place for the time advised (usually until bleeding has stopped, which might be an hour or two). It’s normal to have some oozing of blood from the site on the first day; this should gradually taper off. Your face near the area may feel a bit swollen and possibly bruised. Swelling usually peaks around 48 hours after surgery. During this initial period, stick to very soft foods or liquid diet and avoid hot temperature foods (which can promote bleeding). You might mostly rest, apply ice, and take your medications as directed. Some slight bone graft granules might come out in your saliva – don’t be alarmed if you feel a few sandy particles; a small amount of graft material loss can happen and is expected.
- Days 3–4: By now, bleeding should have completely stopped. Swelling might start to go down after peaking at day 2. You can usually resume gentle daily activities, but still take it easy – avoid strenuous exercise or heavy lifting for at least 3–5 days to not disturb healing. Pain should be markedly improving; many patients find they can transition from any prescription painkillers to just ibuprofen or acetaminophen by this time, if they haven’t already. Continue a soft diet; you might introduce more mushy foods (think scrambled eggs, yogurt, mashed potatoes) as comfort allows. The site inside your mouth will still be tender if touched. You should avoid pulling on your lip or cheek to look at the site, as tempting as it may be – doing so can actually loosen the stitches or tear the incision.
- One Week Post-Op: By the one-week mark, you’ll likely have a follow-up appointment (more on that below). The incision should be mostly healed on the surface. If dissolvable stitches were used, they may be starting to dissolve or fall out. If non-dissolvable, the dentist might remove them around 7–14 days post-op. Swelling should be minimal by now and you might notice a little firm ridge or bump where the graft was placed – that’s the new bone material underneath doing its job. You should feel pretty comfortable at this point, with maybe only mild soreness on heavy chewing or if you press the area (which you shouldn’t do). It’s still advised to stay on softer foods for at least a week or two, as biting into hard foods too soon could disrupt the healing bone graft.
- 2–4 Weeks Post-Op: The gum tissue will be fully healed over by this stage. If any membrane was placed, it’s underneath the gum and either dissolving or integrating; you typically won’t see it (unless it was non-resorbable, in which case the surgeon might remove it around this time, but with the tunnel technique often resorbable membranes are used to avoid another incision). Over these weeks, the bone graft material is undergoing the early stages of osseointegration – your natural bone cells are starting to grow into the graft. You won’t feel this, but internally the graft is transitioning from an “added material” to becoming part of your jawbone. There usually are no activity restrictions after the initial one or two weeks, so by now you can resume your normal diet (still being cautious about not jabbing the area with crunchy foods). Most people feel completely back to normal in terms of daily life.
- Several Months Post-Op: Bone grafts take time to fully mature. Typically, you’ll have a span of a few months (often around 4–6 months for standard cases) before the area is ready for the next step, such as implant placement. In the case of tunnel grafts, surgeons sometimes prefer to wait a bit longer, e.g. 6–9 months, especially if a large amount of graft was placed. During this phase, you won’t have much to do except maintain good oral hygiene and attend any check-ups. The site should be asymptomatic – it will just quietly continue healing. Your dentist might schedule a check or take an x-ray at, say, 4 months to see how the bone is filling in.
Overall, recovery is usually uneventful. Because only a tiny incision was made, patients often note that aside from being careful not to disturb that area, they feel okay fairly quickly. Many go back to work or daily routines (light duties) within a day or two, especially if their job isn’t physically demanding.
It’s crucial to follow all post-op instructions given by your dentist to ensure a smooth recovery and the best results from the graft. We’ll detail key aftercare points next.
Aftercare Instructions
Proper aftercare is essential to help your tunnel graft heal well and to prevent complications. Your dental team will give you specific instructions, likely both verbally and on a take-home sheet. Here are common aftercare guidelines you should follow:
- Bleeding Control: It’s normal to have mild bleeding for the first day. Keep gauze on the site with firm but gentle pressure for as long as instructed (usually changing it every 30-60 minutes until it’s mostly just pink saliva). If bleeding persists or is heavy, place fresh gauze or a damp tea bag and bite down for 20-30 minutes. If it still doesn’t slow down significantly, call your dentist. Also, avoid spitting or rinsing vigorously on day one, as this can dislodge the clot and provoke bleeding.
- Oral Hygiene: Keeping your mouth clean is important, but you must do it carefully. For the first day, do not rinse at all. Starting the day after surgery, you may gently rinse with a prescribed mouthwash or warm salt water after meals, but do so by lightly moving your head side to side and letting the liquid fall out, rather than forcefully swishing or spitting. Do not brush or floss directly over the surgical site until your dentist says it’s okay. You can brush other teeth normally, but be cautious near the area – perhaps use a soft toothbrush and avoid pulling the cheek too much. Often, you’ll be asked to not brush the gum in the graft area for 1-2 weeks; instead, use a gentle rinse to keep it clean. Also, do not probe the area with your tongue or fingers. It’s hard to resist feeling it, but pressure can move the graft.
- Diet: Stick to a soft diet for several days. Good choices include smoothies (not too cold or through a straw initially), yogurt, applesauce, soup (lukewarm, not hot), mashed potatoes, scrambled eggs, oatmeal, cottage cheese, pasta, well-cooked soft vegetables, etc. Avoid crunchy, hard, or chewy foods that could poke or put pressure on the graft site – things like chips, nuts, raw carrots, crusty bread, or tough meats are off the menu during early healing. Also avoid spicy foods or acidic drinks that might irritate the area. As you heal, you can gradually reintroduce more regular foods, but if anything causes discomfort or requires a lot of chewing near the area, hold off on it. Typically, after a week or two, you can eat most foods again, but continue to chew on the opposite side if possible until the dentist confirms the site is stable.
- Activity: Take it easy for at least the first 2-3 days. Avoid strenuous exercise, heavy lifting, or anything that raises your blood pressure and heart rate significantly. Increased blood flow can trigger bleeding. After about 72 hours, you can resume light exercise if you feel up to it, but listen to your body – if you notice throbbing in the area, scale back. Definitely avoid contact sports or activities that could jar your mouth for a couple of weeks (or wear a proper mouthguard if you must participate).
- Medications: Take all medications as prescribed. This often means finishing any course of antibiotics to prevent infection. Use pain medication as needed (the goal is to be comfortable, so don’t “tough it out” needlessly – if ibuprofen every 6 hours keeps you comfortable, stick with it for the first day or two). If you were given a special antibacterial mouthrinse (like chlorhexidine), use it exactly as directed (usually twice daily, after gently brushing/rinsing other areas, swish for 30 seconds and spit). This rinse helps keep the surgical site clean since you won’t be brushing it.
- Ice and Heat: As noted under pain management, use ice packs on the face over the area for the first 48 hours: 20 minutes on, 20 minutes off, while awake. This helps minimize swelling and discomfort. After 48 hours, you can switch to warm moist heat (like a warm towel) on the face if you still have swelling or any jaw stiffness – this can improve circulation and healing. Some patients don’t have much swelling at all with tunnel grafts, but these measures are there if you need them.
- No Smoking or Alcohol: Smoking is one of the worst things you can do after any oral surgery. It significantly impairs healing by reducing blood flow and introduces toxins and nicotine, which can cause graft failure or infection. Avoid smoking entirely for at least the first 2 weeks, and ideally until fully healed (and frankly, this is a great opportunity to quit for good). Alcohol can also slow healing and may interact with medications, so hold off on alcoholic drinks during the initial healing period (a few days to a week, or as advised by your surgeon).
- Avoid Straws and Sneezing Nose Blowing (if upper jaw): For any oral surgery, especially if grafting near sinuses, avoid using straws or any forceful sucking motions for a week or so – the suction pressure in your mouth could dislodge clots or graft material. Similarly, if your graft was in the upper jaw near the sinus, you’d be told to avoid blowing your nose or stifling sneezes (let a sneeze out with your mouth open) for a couple of weeks to prevent pressure from affecting the area.
- Watch for Certain Signs: We’ll detail when to call the dentist in the next section, but as part of aftercare, keep an eye on how you feel. A little swelling and discomfort is normal; increasing pain, significant swelling, or fever are not normal – you’d need to reach out to the office if those occur.
Overall, the aftercare for a tunnel graft is similar to care after a tooth extraction or minor oral surgery, with extra emphasis on being gentle around the graft site. The key is to protect that area: keep it clean but don’t disturb it physically. Given that the gum tissue wasn’t fully opened up, initial healing of the incision is quick (about 1-2 weeks for the gum to close), but the internal healing (bone solidifying) is the longer phase during which you should still be mindful not to traumatize that spot.
Following these instructions will give you the best chance for a successful graft that integrates well, setting the stage for the next steps in your treatment (like placing a dental implant) to go smoothly.
When Should I Call My Dentist After Having a Tunnel Graft?
While most tunnel graft surgeries heal without any issues, it’s very important to know when something might be going wrong so you can seek prompt care. You should contact your dentist or oral surgeon if you experience any of the following after your procedure:
- Excessive or Uncontrolled Bleeding: Some oozing is normal on day 1, but if you have bleeding that is heavy (soaking through gauze quickly) or continues steadily beyond 24 hours despite applying pressure, call your dentist. It may mean the clot isn’t holding or a vessel needs attention. Often, repositioning gauze can help, but if it doesn’t, the dentist might need to see you to manage it.
- Severe Pain Not Managed by Medication: It’s expected to have some soreness, but this should be controllable with prescribed meds or over-the-counter painkillers. If you find that even with medication, your pain is intense and not improving or getting worse after the first 2-3 days, that’s a red flag. Increasing pain after a brief period of improvement could indicate an infection or an issue with the graft site.
- Signs of Infection: Watch out for fever, chills, or feeling ill. Also, increased swelling or redness of the gums after the initial 3 days, or pus/discharge, or a foul taste in your mouth that persists (some odd taste can occur from healing, but a pronounced foul taste or smell can mean infection). If the graft area becomes very tender, swollen, and perhaps you see whitish or yellowish fluid, call immediately. Infections can often be managed with antibiotics and drainage if caught early, but it’s crucial to act fast to protect the graft.
- Graft Material Coming Out in Large Amounts: As noted, a few granules is normal. But if you suddenly see a significant piece of something in your mouth (like part of a membrane or a chunk of graft material) or a lot of grainy particles continuously coming out, the graft might be compromised. You should let your surgeon know. They may want to check if the site has opened or if the graft is still intact. Do not attempt to push anything back in; just save any material in a clean container to show the dentist, if possible.
- Suture Problems or Wound Opening: If a stitch comes loose or breaks early, or if you notice the incision site has opened up visibly, give your dentist a call. A small opening might not be catastrophic (sometimes things still heal fine under a blood clot), but a larger one might need a stitch replaced. You should definitely alert them so they can decide if you need to come in.
- Numbness or Tingling: It’s rare with a tunnel graft (since it’s usually not near major nerves unless in lower jaw), but if you experience prolonged numbness or tingling in the lip, chin, or tongue after the local anesthesia should have worn off, inform your surgeon. It could indicate some nerve irritation. They will likely want to monitor it.
- Other Unusual Changes: Trust your instincts. If something just feels off – like swelling that suddenly worsens after initially going down, difficulty swallowing or breathing (very, very rare, but could be a severe swelling or allergic reaction), or anything concerning – it’s better to call and be reassured or checked, rather than ignore it.
When you call, explain that you recently had a tunnel graft and describe your symptoms clearly. Most dental offices will prioritize post-surgical concerns and get you seen quickly if needed. If it’s after-hours, there’s usually an emergency line or the surgeon on call will get back to you. Serious complications are uncommon with this procedure, but being vigilant is important for your safety and the success of the graft.
In summary, don’t hesitate to reach out if you suspect a complication. Prompt attention can often remedy issues without jeopardizing the outcome. Your dentist expects these calls for guidance – it’s part of the healing process to keep in touch if anything arises.
Follow-Up Appointments
Follow-up care is an essential part of the tunnel graft procedure’s success. You will typically have a few appointments after the surgery to ensure everything is healing correctly and to plan next steps. Here’s what to expect in terms of follow-up:
- Initial Post-Op Check (around 1 week): Most surgeons will see you roughly 7–10 days after surgery. At this visit, they will examine the surgical site to make sure the incision is closed and healing well. They’ll check for any signs of infection or unusual inflammation. If you have non-dissolvable sutures, these might be removed at this appointment (or sometimes at 2 weeks, depending on the surgeon’s protocol). If the stitches were dissolvable and haven’t fully disappeared yet, they’ll simply monitor them. The dentist will likely gently clean the area or remove any debris if present. This is also a good time for you to ask questions and discuss how you’re feeling. If you’ve had any difficulties, let them know. They might reinforce oral hygiene instructions or diet guidelines if needed.
- Secondary Follow-Up (if needed): Some providers might schedule another check at the 3-4 week mark, especially if there were any concerns at week 1 or if a membrane needs removal. Many modern membranes are resorbable, so an extra visit might not be necessary unless the dentist wants to ensure that gum tissue has fully covered the area. By this time, the gum should look healthy and pink with maybe slight firmness underneath due to the graft. If everything looks good, they’ll then set a timeline for the longer-term follow-up.
- Healing Evaluation (Months Later): The critical follow-up comes after a few months of healing. Typically, 4–6 months post-graft, your dentist will schedule a visit to assess the bone regeneration. This often involves taking a new X-ray or CBCT scan of the area to see how much new bone has formed and whether it’s sufficient for implant placement. In some cases, they may even numb the area and make a tiny poke in the gum to feel the bone width or use a small instrument to gauge the ridge (though often imaging is enough). If the tunnel graft was large or if they want to be very cautious, they may wait up to 6–9 months before this assessment, as Dr. Ramsey Amin notes for larger cases. At this evaluation, one of two things usually happens:
- If the bone growth looks successful (the ridge is now adequately wide and dense), they will give you the green light to proceed with the next phase, which is typically dental implant placement. Sometimes the implant can even be scheduled to be placed at the same appointment if planning was done, but usually they separate it. You’ll then discuss implant surgery details.
- If the bone fill is inadequate (which is not common, but can happen), the dentist will discuss options. In some instances, a second graft (touch-up) might be needed, or an alternative approach considered. However, tunneling techniques, when done properly, have shown very good success in bone fill, so needing a re-graft is not typical unless there was a complication.
- Implant Placement and Beyond: Once the graft is deemed healed, the follow-ups shift to the implant process. The implant surgery will be done, and then you’ll have follow-ups for that. It’s worth noting that an implant can sometimes be placed concurrently with a bone graft if the deficiency is minor, but with a tunnel graft, it’s usually done as a separate stage because you want the graft to consolidate first. So, expect the implant to be a later procedure with its own set of follow-ups.
- Long-Term: After everything – graft and implant – is completed, you’ll just continue with regular dental checkups. There’s no long-term special maintenance for the bone graft itself, other than keeping good oral hygiene and health to ensure you don’t lose that bone again (for example, maintaining excellent gum health to prevent periodontal disease from causing future bone loss around the area).
Throughout your follow-up schedule, keeping appointments is very important. Even if you feel fine, those check-ins allow the dentist to catch any subtle issues early. For example, if a small portion of graft didn’t take or if a corner of the incision was slightly open, they can manage it before it becomes problematic. It also reassures you that all is on track.
Lastly, if at any point between scheduled follow-ups you have concerns (refer back to “When to call”), you might end up in for an unscheduled check – that’s perfectly okay. The healing phase isn’t over until your dentist has confirmed you’re ready to move on, so staying in communication is part of the process.
What Are the Advantages of Tunnel Graft?
The tunnel graft technique offers several key advantages over traditional grafting methods, especially for suitable cases. Here are the main benefits:
- Minimally Invasive (Small Incision): The most obvious advantage is the tiny incision used. Because the approach is done through a small “keyhole” opening, there’s no large gum flap cut open. This usually means less trauma to the tissue, leading to reduced post-operative pain and swelling. Patients often find recovery easier and faster, with many reporting very mild discomfort compared to what they expected from a bone graft procedure.
- Few Stitches and Faster Healing of Gums: With only a few or even just one suture needed to close the tunnel entry, the gum tissue heals quickly at the incision site. There’s less risk of sutures pulling or flap complications, simply because there isn’t a big flap. The gum’s blood supply is largely preserved. In surgical principles, keeping the periosteum (the membrane on bone) intact except for a small area helps maintain blood flow to the graft site. That can enhance healing and integration of the graft.
- Effective Ridge Widening: For horizontal bone deficiencies, tunnel grafts have shown excellent results in regenerating bone width. When performed correctly, this technique can achieve the necessary bone fill to allow implant placement where it previously wasn’t possible. Dr. Lauren Anderson notes that research shows tunneling techniques can have very high success rates for achieving the coverage or augmentation desired (though she was referring to gum coverage, the principle of success when done by a skilled clinician applies similarly to bone augmentation).
- Lower Risk of Gum Recession or Scarring: Because the gum tissue isn’t reflected back extensively, the risk of causing gum recession on adjacent teeth or leaving noticeable scarring is minimized. The aesthetic outcomes can be better – you maintain the natural look of the gumline. In fact, one practitioner highlighted that the tunnel procedure “not only grows bone, but it also grows gums too!”. By adding volume under the gum, the gum often plumps up, which is beneficial for aesthetic contours.
- Reduced Risk of Complications from Donor Site: If you compare to an autogenous block graft (where they take a block of your own bone, often from your chin or jaw angle), the tunnel graft (often using allograft or synthetic bone) avoids the need for a second surgical site to harvest bone. That means no additional pain or risk at a donor site, and a shorter procedure. It can also be done with just local anesthesia or light sedation rather than more extensive anesthesia in some cases, because it’s less invasive overall.
- Cost Effective: Tunnel grafts can be more cost-effective than some alternatives. For example, a block onlay graft often requires more surgical time and sometimes an operating room setting, which drives up cost. One implant dentist noted that the tunnel method is “very cost effective” and more affordable than block grafting in the situations where it can be used. You’re essentially paying for a simpler outpatient procedure rather than a bigger reconstructive surgery.
- Allows Implants in Challenging Cases: Perhaps the biggest advantage is that it enables dental implant placement in cases that might otherwise be deemed impossible or too risky without grafting. If you’ve been told you don’t have enough bone by one dentist, a tunnel graft could be the solution that another specialist offers to give you that chance at implants. In other words, it expands the treatment options for patients with atrophic ridges, with a procedure that is more patient-friendly than older techniques.
- High Success Rate When Done by Experts: Although it’s a specialized technique, those who are experienced with it report high success rates. The literature and clinical reports indicate that when proper technique and case selection are employed, the bone fill is predictable and long-lasting. The long track record (pioneers have been doing it for decades) suggests it’s not an experimental thing – it’s proven when in the right hands.
- Less Post-Op Discomfort and Downtime: With less pain and swelling, patients can typically return to normal routines faster. Some may only need a day or two off work, as opposed to a week if an extensive open graft was done. This quicker recovery can be a significant quality-of-life advantage.
It’s important to highlight that these advantages hold when the procedure is appropriate for the patient’s condition and done by a skilled clinician. The tunnel graft is technique-sensitive – meaning the outcome is highly dependent on the operator’s skill. When done well, it packs in a lot of benefits as listed above.
In summary, the tunnel graft offers a combination of being gentle on the patient yet effective in regenerating bone, which is a winning combination for those who are candidates for it.
Are There Any Disadvantages or Risks with Tunnel Graft?
No surgical procedure is without potential downsides. While tunnel grafting has many benefits, it also comes with some disadvantages and risks to consider:
- Technique Sensitivity and Limited Practitioners: The tunnel graft is a specialized technique that not all dentists or surgeons perform. In fact, it’s done by relatively few practitioners in the U.S., and many dentists may not even be familiar with it or trained in it. This means if you want this method, you might need to seek out a specialist (periodontist or oral surgeon) who has experience in tunneling. A less experienced provider attempting it could have a higher chance of errors. The procedure requires finesse; for example, improper tunneling can lead to tears in the gum tissue or uneven placement of graft. So, one disadvantage is it’s not widely available everywhere, and outcomes are highly operator-dependent.
- Not Suitable for All Cases: Tunnel grafting is great for certain horizontal defects, but it’s not a one-size-fits-all solution. If you have a severe bone defect, especially vertically (insufficient bone height), tunneling may not be adequate because it primarily adds width, not height. Extremely narrow ridges or those with very irregular shape might require alternative approaches (like block grafting or distraction osteogenesis). Additionally, as Dr. Amin pointed out, it “takes a particular bone shape for this to work” – if your ridge is too thin at the top or the gum is bound too tightly, the tunnel might not accommodate enough graft. In such cases, trying a tunnel graft could fail or yield suboptimal bone gain. Thus, a risk is that you undergo it and then discover it didn’t fully solve the issue, necessitating another procedure.
- Risk of Gum Tissue Tear or Exposure: One of the technical risks during the surgery is that the gum (gingival tissue) could tear or get a small hole while creating the tunnel, especially if the tissue is very thin. If a significant tear occurs, the surgeon might have to convert to an open procedure on the spot to properly place and cover the graft. Post-operatively, there’s also a risk (albeit low) that the thin overlying gum could recede or the incision could reopen, leading to exposure of the graft or membrane. If part of the graft becomes exposed to the oral environment, it can invite infection or failure of that portion of graft. Keeping the site closed is critical; with tunneling, this is usually maintained, but a small risk exists.
- Infection or Graft Failure: Like any bone graft, a tunnel graft can get infected or fail to integrate. If bacteria enter the site or if the graft material doesn’t incorporate, you could end up with a situation where the new bone doesn’t form as intended. Signs of this would be persistent swelling, drainage, or lack of bone fill on follow-up x-rays. Infection might require antibiotics or even removal of the graft material to allow healing. The closed nature of the technique might make an infection a bit tricky to drain if it occurs (since there’s no wide open flap to clean; though the small incision could be reopened if needed). Fortunately, infection rates are generally low, especially if antibiotics are used and oral hygiene is maintained, but it’s a risk to be aware of.
- Nerve Considerations in Lower Jaw: In the lower jaw (mandible), one has to be cautious about the location of the inferior alveolar nerve (which runs in the jawbone and gives feeling to the lower lip and chin). A tunnel graft done in the lower back area is usually designed to avoid the nerve canal by adding bone to the outer surface. However, if drilling or instruments go too deep, there’s a slight risk of nerve irritation or damage. The practitioners mitigate this with careful imaging and staying in the safe zones, but any work near nerve canals carries a minor risk of postoperative numbness or tingling in the lip/chin. This risk is low, but informed consent should cover it. The text from Dr. Amin’s post suggests sometimes a nerve repositioning is an alternative to grafting if vertical space is lacking; nerve repositioning is itself a high-risk procedure for nerve injury. So in comparison, tunnel graft (which avoids manipulating the nerve directly) is less risky for nerve problems, but it still necessitates careful technique to not compress the nerve with graft or disturb it.
- Longer Overall Treatment Time: With a tunnel graft, often the healing time before you can proceed to the implant is on the order of **several months (4–9 months)】. This staged approach means the total time to get your final teeth is longer. Dr. Amin illustrated that it could take 9–14 months in total to go from graft to finished implant restoration. Some other techniques, like ridge splitting or certain immediate graft/implant combos, might shorten the timeline. So one could consider it a drawback that tunnel grafting is a slower process (because you graft first, wait, then implant, then wait again for implant to heal). However, many graft techniques have similar timelines, so this isn’t unique to tunneling, but it’s worth noting you need patience.
- Possibility of Incomplete Bone Fill: While success rates are high, there’s always a chance that the graft doesn’t fully “take” everywhere. You might get some bone gain but maybe not enough for the widest part of the implant you wanted. In that case, you might still need a touch-up procedure or to use a slightly smaller diameter implant. This is not common if the case selection is good, but it can happen, meaning the outcome might not be 100% what was planned. Essentially, nature is variable – occasionally, grafts don’t turn into rock-solid bone uniformly. The risk of needing additional intervention is something to discuss with your dentist beforehand.
- Cost (if compared to doing nothing): While we noted it can be cost-effective relative to other grafts, a tunnel graft still is an added cost to your treatment. If one were to choose an alternative like a dental bridge or a partial denture instead of implants, they might avoid the graft expense altogether. So in the bigger picture, the disadvantage could be that you are investing extra money and time for this advanced technique in order to get implants. If finances are tight or if insurance doesn’t cover it, this could be considered a drawback compared to non-implant solutions. (However, for many, the improved outcome of having implants makes the graft worth it.)
In summary, the risks and disadvantages include the specialized nature of the procedure (requiring a skilled operator), limitations on when it can be used, potential surgical complications (as with any graft: infection, wound issues, nerve risks), and the extended timeline and cost. It’s important to weigh these against the benefits. A qualified surgeon will only recommend a tunnel graft if they believe the benefits outweigh these risks for your specific case, and they will take steps to minimize the risks (e.g., careful technique, antibiotics, proper case selection). Always ensure you have a thorough consent discussion so you understand the potential complications before proceeding.
Are There Alternatives to Tunnel Graft to Consider?
Yes, there are several alternative approaches to address the problem of insufficient bone or gum tissue, depending on your specific situation. If a tunnel graft isn’t suitable or if you’re exploring all options, consider the following alternatives:
For Bone Augmentation (if considering implants):
- Traditional Open Bone Grafting: The conventional method to build up a narrow ridge is to reflect the gum tissue with a bigger incision, directly visualize the deficient area, and place bone graft material and a membrane (guided bone regeneration, or GBR). This is similar to what’s done in a tunnel graft except it’s done under direct open access. The advantage is the surgeon can see and shape the graft very precisely; the disadvantage is it’s more invasive (larger flaps, more stitches, possibly more post-op discomfort). If the deficiency is moderate, many oral surgeons or periodontists may opt for this traditional GBR approach with particulate bone graft if they’re not trained in tunneling.
- Block Bone Graft (Onlay Graft): This involves taking a solid block of bone (either from the patient – typically chin or ramus of the jaw – or from a bone bank) and physically attaching it to the deficient area with screws. Block grafts are a tried-and-true method for severe bone loss, especially when both width and height need to be increased significantly. They do require an open surgery (lifting the gum) and a donor site if using your own bone. As noted earlier, block grafts tend to be more expensive and involve more recovery, but they might be the best choice for certain large defects. Dr. Amin mentioned he often uses block grafting for the front of the mouth if needed, whereas tunnel grafting he uses in the back. So, block grafting is an alternative when tunneling either isn’t enough or the surgeon isn’t comfortable with tunneling.
- Ridge Splitting/Expansion: In some cases of a narrow ridge (especially if the bone height is okay), a technique called ridge splitting can be used. The surgeon makes a cut along the ridge of the bone and gently separates (splits) the bone into two plates, creating a gap that can be filled with bone graft material. This essentially “expands” the ridge width. It’s often done simultaneously with implant placement in select cases. Ridge splitting can be a good alternative for certain moderate narrow ridges, but it requires a certain bone elasticity and volume to start with. If the bone is extremely thin or brittle, splitting might be high risk. Compared to tunneling, ridge splitting is also technique-sensitive and not every surgeon does it.
- All-On-4 or Zygomatic Implants (Avoiding Grafts): If the idea of bone grafting is not appealing or if bone loss is so extensive, sometimes the alternative is to avoid grafting altogether by altering the implant approach. Techniques like All-on-4 implants use strategically angled implants to anchor a full denture in cases of jawbone resorption, often avoiding the need for grafts. In the upper jaw, zygomatic implants anchor in the cheekbone for cases with extreme bone loss, bypassing the need to build up the atrophied upper jaw. These are very specific solutions (mainly for full arch replacements), but they are alternatives for those scenarios. For single-tooth situations, sometimes a short implant or narrow-diameter implant could be used instead of grafting, if the deficiency is minor. Essentially, the implant choice can sometimes accommodate less bone by being smaller or placed at an angle.
- No Implant – Restorative Alternatives: Of course, one alternative to any bone graft + implant plan is to choose a different tooth replacement method that doesn’t require as much bone. For example, a dental bridge (using the neighboring teeth for support) can replace a missing tooth without needing an implant or graft. A removable partial denture could fill a gap as well. These don’t address bone loss (and in fact bone will continue to resorb underneath), but if someone cannot undergo grafting, they are viable non-surgical options. They might not be as comfortable or functional as implants long-term, but they avoid the need for bone augmentation surgery entirely.
For Gum Recession (if considering soft tissue grafts):
- Pinhole Surgical Technique (PST): This is another minimally invasive method for treating gum recession where, instead of a traditional graft, the dentist makes a needle-hole and uses special instruments to loosen gum tissue and pull it down over the receded areas, inserting collagen strips to keep it in place. It’s somewhat analogous to the tunneling technique for gums, but with an even less invasive twist (no scalpel incisions at all, just needle access). If a patient was considering a tunnel technique for gum grafting, the Pinhole technique could be an alternative. Both are specialized periodontal procedures aimed at reducing invasiveness compared to free gum grafts.
- Traditional Gum Grafting: If the issue was gum recession and a tunneling approach isn’t suitable, the alternative is the conventional connective tissue graft or free gingival graft, where tissue (from your palate or donor) is sutured onto the receded area. This is more invasive than the tunnel technique for gums, but it’s widely practiced and has high success rates.
Back to bone grafting alternatives: Your oral surgeon or periodontist will recommend what they feel is best for your condition. If they propose a tunnel graft, it’s likely because they believe it offers advantages in your case. However, it’s always reasonable to ask about alternatives. Ask questions like, “What if we don’t do this graft? Is there another way to replace my tooth?” or “Why not a block graft or another method in my case?” A good provider will explain the rationale.
For example, you might learn that your defect is minor enough that a simpler socket graft or just using a narrower implant could do the job (negating the need for a tunnel graft). Or conversely, if your defect is severe, the alternative might actually be more invasive (like block graft or nerve repositioning), making the tunnel graft relatively conservative in comparison.
In summary, alternatives exist ranging from other graft techniques to different implant strategies or even non-implant solutions. Each comes with its own pros and cons. It’s worth discussing these to ensure you’re comfortable that the tunnel graft is indeed the right choice for you. Oftentimes, patients opt for the tunnel graft because it promises a good result with less invasiveness than the alternatives, but knowing your options is key to informed consent.
How Much Does Tunnel Graft Usually Cost?
The cost of a tunnel graft can vary widely depending on factors like the extent of bone needed, the materials used, and the region and expertise of the surgeon. There isn’t a fixed price for “tunnel graft” as a separate line item in most cases; it would typically fall under bone grafting procedures. However, we can discuss general cost ranges for bone grafting to give you an idea, and where tunnel grafting might sit in that spectrum.
On average, a dental bone graft can cost anywhere from a few hundred dollars to a few thousand dollars. A survey of costs in the United States found that:
- Synthetic or Minor Bone Grafts: Using a small amount of synthetic bone or a simple socket graft might cost around $300 to $800 for a single site.
- Allograft (Donor Bone) Grafts: These tend to range roughly $600 to $1,500 per site. This would likely be the category a tunnel graft falls into if donor bone is used, as often is the case, since the procedure typically uses particulate graft (not your own bone).
- Autograft (Your Own Bone) Grafts: If a procedure involves harvesting your own bone (like a block graft from the chin), costs can be higher, often $2,000 or more (sometimes up to $4-5k for extensive cases) because it’s a more complex surgery with dual sites.
- Combination/Advanced Grafts: If a tunnel graft is combined with special materials (like growth factors, membranes, PRF, etc.), those add some cost, but usually a membrane might add a few hundred dollars.
Given the above, a fair estimate for a tunnel graft (which usually uses allograft or xenograft bone plus membrane) might be in the ballpark of $600 to $2,000 for a single area. The national average of bone graft procedures (all types combined) was cited around $500 to $1,200 on the low-to-moderate end, with high complexity cases averaging around $2,500 to $3,500.
It’s important to note that Dr. Ramsey Amin mentioned tunnel grafting is more affordable than block grafting in his practice. For context, block grafts might cost a couple thousand dollars because of the extra surgical steps. So if a block graft would’ve been, say, $2500, a tunnel graft might be closer to the $1000-$1500 range for the same area – this is a hypothetical example, but it aligns with the idea that less surgical time and no need for general anesthesia or hospital settings keep the cost down.
Also consider:
- Geographic variation: Big cities or coastal areas tend to have higher fees than rural or inland areas. For instance, the price in a Beverly Hills practice might be higher than a small town practice.
- Surgeon’s expertise: A specialist with a lot of experience who offers a unique technique might charge a premium for it. On the other hand, some specialists have standard fees per graft site regardless of technique.
- Extent of case: If multiple teeth areas require grafting via a tunnel approach, costs will increase accordingly (though sometimes there are some economies if done in one surgery).
- Adjunct procedures: If you’re doing sedation, there may be an anesthesia fee. If PRP/PRF (platelet-rich plasma/fibrin) is used, some offices charge an extra fee for that service.
Insurance and Financing:
Dental insurance might cover a portion of bone grafting in some cases, but this is highly variable. Many insurances consider bone grafts for implant site development as an elective or non-covered procedure (since implants themselves are often not covered). However, if the graft is done in conjunction with medically necessary extractions or to preserve bone for dentures, insurance might cover it partly. Generally, insurance will likely only cover a bone graft if it’s deemed medically necessary, not purely for an elective implant. Even then, coverage can be partial. It’s crucial to get a pre-estimate from your insurer. Without insurance, you’re looking at the full cost out-of-pocket, which on the low end might be a few hundred dollars and on the high end a few thousand, as described.
Many dental offices offer financing options (such as CareCredit or in-house payment plans) to help manage the cost. Since implants and grafts are an investment, don’t hesitate to discuss these options. For example, CareCredit’s data suggests average costs as we listed and encourages finding providers that accept such financing.
To get a personalized quote, you’d have to consult with your dentist/oral surgeon. They will factor in how much graft material is needed, the complexity (which influences chair time), and any additional components. Always ask for a detailed treatment plan with costs before scheduling, so you know exactly what to expect financially. Also inquire if the fee for the tunnel graft includes follow-up visits and includes the membrane, etc., or if those are separate.
In sum, while it’s hard to pin an exact number, plan for at least several hundred dollars for a tunnel graft, and know that in some cases it could exceed a thousand. When comparing with alternatives, remember to weigh the cost against potential additional surgeries or complications. For many patients, the cost is justified by the ability to successfully get an implant and the relatively easier recovery this technique offers. And considering how common bone grafts have become (about 58% of implant cases require one on average), many find the investment worthwhile for their long-term oral health and function.
Common Misconceptions or Controversies about Tunnel Graft
As a relatively specialized procedure, the tunnel graft comes with its share of misconceptions and even some professional debate. Let’s clear up a few common misunderstandings and touch on any controversies:
- “Tunnel Graft” vs “Tunneling Gum Graft” – Same Thing?
Misconception: Some patients hear “tunnel technique” and might confuse a bone tunnel graft with the gum grafting tunnel technique (and vice versa).
Clarification: These are related in approach (both use a tunneling method), but they address different issues. A tunnel bone graft is aimed at regenerating jawbone width for implants, whereas a tunneling gum graft is aimed at covering exposed roots in gum recession cases. They are not interchangeable procedures, though they share a minimally invasive philosophy. It’s important to know which one is being discussed for your situation. If your concern is gum recession, a tunnel gum graft or pinhole technique might be on the table. If your concern is jawbone for an implant, then tunnel bone graft is the relevant one. Our article has mostly focused on bone grafting. - “Is the Tunnel Technique Proven? I heard it failed in the past.”
Misconception/Controversy: There is a notion among some dentists (especially older ones) that tunneling for bone grafts was tried decades ago and didn’t work well, hence they might dismiss it.
Clarification: It’s true that earlier attempts (back in the 1970s or so) had mixed success, but techniques and materials have improved tremendously since then. Pioneers like Dr. Hilt Tatum have refined this over 40+ years. Modern tunneling (including branded variants like the S.M.A.R.T. technique) have reported very high success when done correctly. So while some practitioners may be skeptical or simply not up to date, the procedure is supported by contemporary cases and literature as a viable option. Essentially, it’s not experimental; it’s just specialized. The success largely depends on the surgeon’s skill – as Dr. Amin pointed out, it’s “very technique sensitive” and the success comes from the clinician’s experience, not just the method itself. If you encounter a dentist who doesn’t know about it or is dismissive, consider seeking a second opinion with a specialist who does these regularly, rather than assuming the method is faulty. - “Bone Grafts are horribly painful.”
Misconception: People often think any bone surgery will be extremely painful or that bone grafting in the jaw involves a major operation (some imagine hospital setting, bone taken from hip, etc.).
Clarification: For most dental bone grafts (including tunnel grafts), the procedures are done in-office, often with local anesthesia and maybe sedation. Patients usually report manageable pain levels afterward, often less than anticipated. The tunnel graft, in particular, is designed to minimize pain and downtime. Also, the majority of bone grafts in dentistry use processed bone from a tissue bank or synthetic materials, not a chunk sawed from your leg or hip. That older style (harvesting from hip) is reserved for extreme cases (like jaw reconstruction after accidents or pathology). Typical implant-site bone grafts do not require that kind of donor site. So, while “bone graft” sounds scary, the reality for dental procedures is much more patient-friendly than the name implies. - “My body might reject the graft.”
Misconception: There’s fear that if donor bone or animal bone is used, your body could reject it like an organ transplant.
Clarification: The materials used in bone grafts are not like a whole organ with living cells. They are usually mineralized bone particles that act as a scaffold. Allograft bone (from a human donor) is processed to remove cells and proteins that would cause immune reactions, so it’s biocompatible. Xenograft bone (often from bovine sources) is similarly treated to be just a sterile mineral matrix. Your body doesn’t “reject” these; rather, it gradually resorbs and replaces them with your own bone. There is a very low risk of any kind of immune rejection. Allergic reactions are exceedingly rare. Infection transmission is also extraordinarily low due to rigorous screening and processing of donor tissues. So, patients should know that bone graft materials are generally safe and well-tolerated. If someone is uncomfortable with donor tissue, synthetic or autogenous options exist, but the concept of “rejection” shouldn’t be a major worry. - “Once I get a bone graft, I’ll never lose bone there again.”
Misconception: One might think that grafting is a permanent fix and that bone will stay forever once regenerated.
Clarification: While a successful bone graft does become integrated bone, it’s still subject to the same biological factors as any bone. If you later develop gum disease around an implant or if there’s trauma or infection, that bone can resorb as well. Also, if no implant or tooth is placed and the area isn’t stimulated, some of the grafted bone might resorb over time (though the bulk usually remains if it’s healed with an implant because the implant will then provide stimulation). The graft is meant to rebuild bone for a purpose (like an implant); maintaining the health of that implant and surrounding gum is key to keeping the bone long-term. So patients shouldn’t neglect oral hygiene or regular checkups thinking the graft “solves” bone loss permanently regardless of future care. - S.M.A.R.T. Technique and Other Brands:
Controversy/Misconception: The S.M.A.R.T. technique (which stands for Subperiosteal Minimally Invasive Ridge Augmentation Technique) is a branded method similar to tunnel grafting, which got attention in recent years. Some marketing around it might make it sound like a revolutionary new procedure that only certain certified dentists can do.
Clarification: S.M.A.R.T. is essentially a refined tunnel graft approach combined with use of growth factors and special membranes. While it’s a positive advancement, it’s not completely different from the principles of tunneling that have existed – it’s an evolution. The “controversy” if any is among professionals debating if it’s truly superior or just a rebranding. For a patient, the key takeaway is that there are various names and techniques in the realm of minimally invasive grafting. Whether your doctor calls it tunnel graft, SMART, or others, what matters is their experience and your outcome. There isn’t widespread controversy in the sense of it being a dubious practice; the main debates are technique preference among clinicians. - “Tunnel graft is only for lower jaw.”
Misconception: Because many references emphasize the lower back jaw application, one might think it can’t be used elsewhere.
Clarification: While it’s most commonly indicated for the lower posterior (and that’s where it often shines), the tunnel approach can be used in other areas for horizontal augmentation, even the upper jaw or front areas, if conditions allow. Dr. Amin was asked if you can widen the upper jaw with a bone graft and his answer was “Yes!!!!”. So it’s not exclusive to the mandible. Each case is unique though – upper jaw has a different bone type and might need a different approach sometimes (like sinus lift for vertical issues). But if the primary issue is thin bone width, tunnel grafting is a tool that could be considered in various locations.
In terms of controversies, there aren’t major scandals or anything with tunnel grafting; it’s more about acceptance and training. The procedure is generally well-regarded by those who use it, and patients who’ve had it typically have positive outcomes. The biggest “controversy” might simply be that it’s underutilized, with many professionals sticking to older methods either out of habit or lack of exposure. For patients, the important thing is not to be swayed by misconceptions. If you’ve heard conflicting things, bring them up with your dentist. They can explain in the context of your case what is fact or myth.
Bottom line: Tunnel grafting is a modern, innovative approach in dentistry. Like any procedure, it should be recommended for the right reasons and done by the right hands. When it is, it’s a safe and effective option. Don’t let myths or lack of awareness prevent you from considering a tunnel graft if it’s indicated – but always make sure you have a practitioner who is knowledgeable and forthcoming about all aspects of the treatment.
Finding an Experienced Provider: If you think a tunnel graft might be right for you, make sure to consult with a qualified dental specialist. Oral & maxillofacial surgeons and periodontists are the experts in grafting procedures. Because not all professionals offer the tunnel technique, you may want to ask specifically about their experience with it. Feel free to use our DentistNearMeReviews.com directory to search for oral surgeons or periodontists in your area – patients often leave reviews that can help you gauge a provider’s expertise and care. Having a dentist who is well-versed in advanced grafting techniques can give you confidence that you’re getting the best care for your oral health needs.